In my last post I designed a Power-on ROM circuit (PROM) and put together a prototype of it. Unfortunately it didn’t work due to a couple of mistakes I made in the design. I rectified those errors and tested it on my bench - everything seemed to check out.
First time boot
The next thing to do was to install the PROM card into my BBZ80 and try it for real. I removed the GAL22V10 from my ROM card as it wouldn’t be needed and flashed the 64 column version of ZYMON2 onto my EEPROM.
I’d be lying if I said I wasn’t nervous when I hit the power.
The computer started up and … nothing. No display.
I was slightly crestfallen, but in all honesty I never expect anything to work. What I wasn’t looking forward to was debugging this thing. My previous attempts of debugging my BBZ80 have been tedious, with lots of scope traces and just hours of frustration.
I took a day off.
ROM mapping
It came to me suddenly during my downtime; the reason for it not working was quite simple. My BBZ80 ROM board was designed for a 32K ROM that’s been split into 16K chunks, one high (when A15 is high) and one low (when A15 is low). This was to accommodate the Amstrad CPC 464 memory mapping I was messing about with.
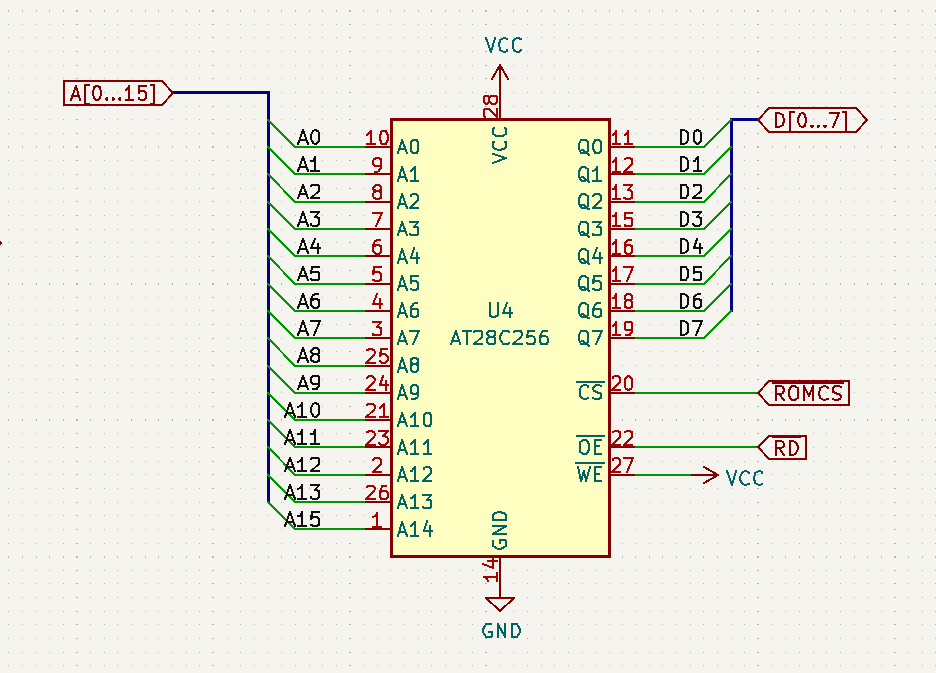
However ZYMON2 is a 2 kilobyte ROM that’s located at $E000, but it’s mapped into $0000 by the PROM circuit. ZYMON2 has a boot sequence that is like this:
	ORG	$0000

	LD HL,COLD_START		; THE KEY IS E000, PUT IT IN HL.
	LD B,(HL)			; SAVE KEY DATA.
	LD (HL),$00			; ZERO THE KEY LOCATION.
	LD A,(HL)			; READ THE KEY LOCATION
	LD (HL),B			; RESTORE OLD KEY DATA
	CP $21				; TEST KEY EQUAL TO 21?
	JR NZ,ZERO_1			; NOT 21 SO JUMP TO (ZERO)
	JP $E00F			; BRANCH TO E00F
	IN A,(IO_MEMORY_CONTROL)	; SWITCH OFF THE POWER ON JUMP
	LD DE,ZYMON_HOME		; POINT TO ZYMON'S HOME
	LD BC,ZYMON_SIZE		; LOAD ZYMON'S SIZE=2K BYTES
	LDIR				; TRANSFER ZYMON TO PAGE ZERO
	JP ZERO_1			; BRANCH TO (ZERO)
Basically:
- Do a check to see if it’s running in RAM
- If not, it must be in ROM - so JUMP to
$E00F(in ROM) - Copy itself to RAM at
$0000 - Restart
There will be times that the program counter is $0xxx and others that it’s $Exxx. When it’s $Exxx, address lines A15, A13 are high which means I’m reading from the wrong place in my ROM.
I could rectify this in a couple of ways; the proper way would be to unhook the upper address lines from the ROM so that I can only address the lower 4K (like the real Interak does). The second way would be to bodge it by padding the 2K ZYMON2 image to 4K and then simply repeating it all over my ROM to fill the 32K. So that’s what I did.
ZYMON2
I burned the EEPROM again and booted the machine. I’m not sure what I expected but it wasn’t this:
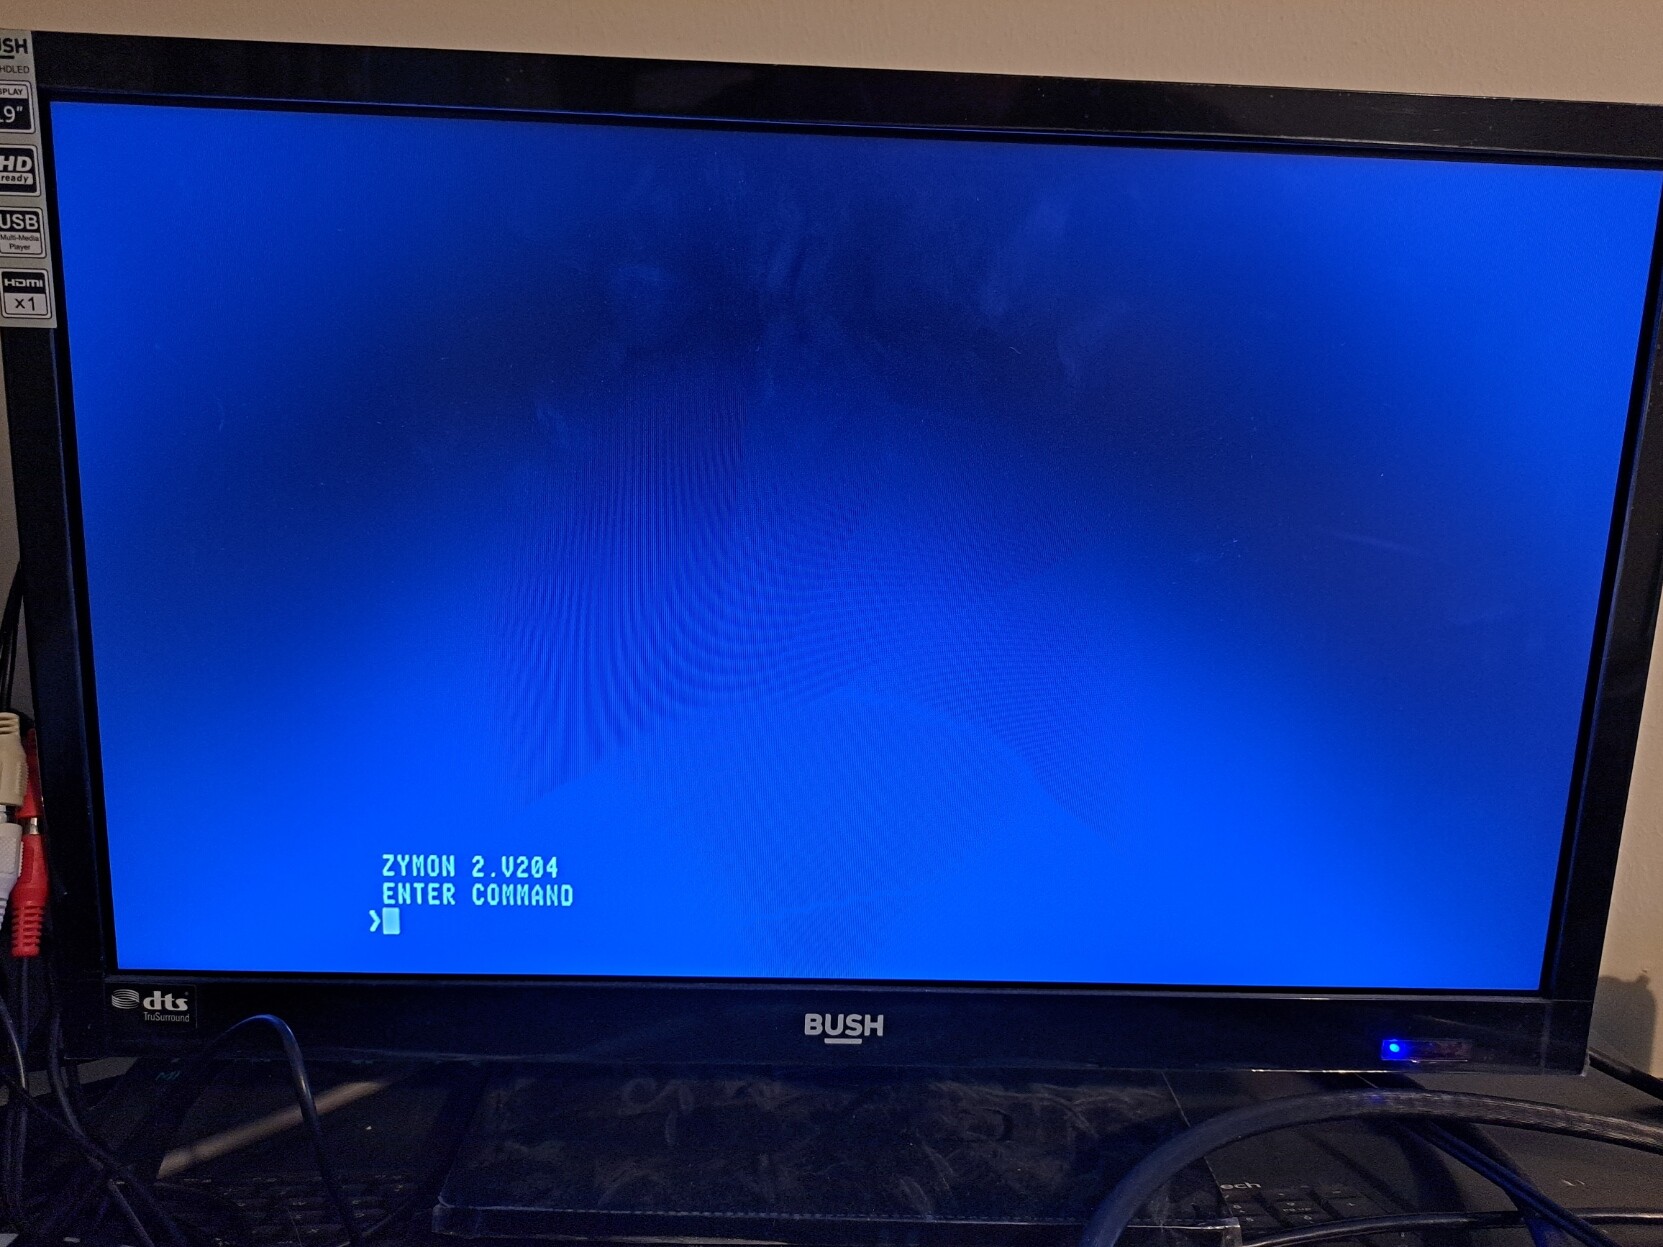
I was greeted by the ZYMON2 boot prompt; something I have never seen outside of my emulator or a picture!
For this to have worked, the PROM circuit must have been capable of reading the mapped ROM, writing to RAM and then disabling the PROM mapping. The memory-mapped Pico VDU display had to be in the right memory location and be able to handle the screen in the right format.
All of the things I’ve build have come together and worked enough to boot me into ZYMON2. My breadboard RC2014 is behaving like an Interak! What a feeling.
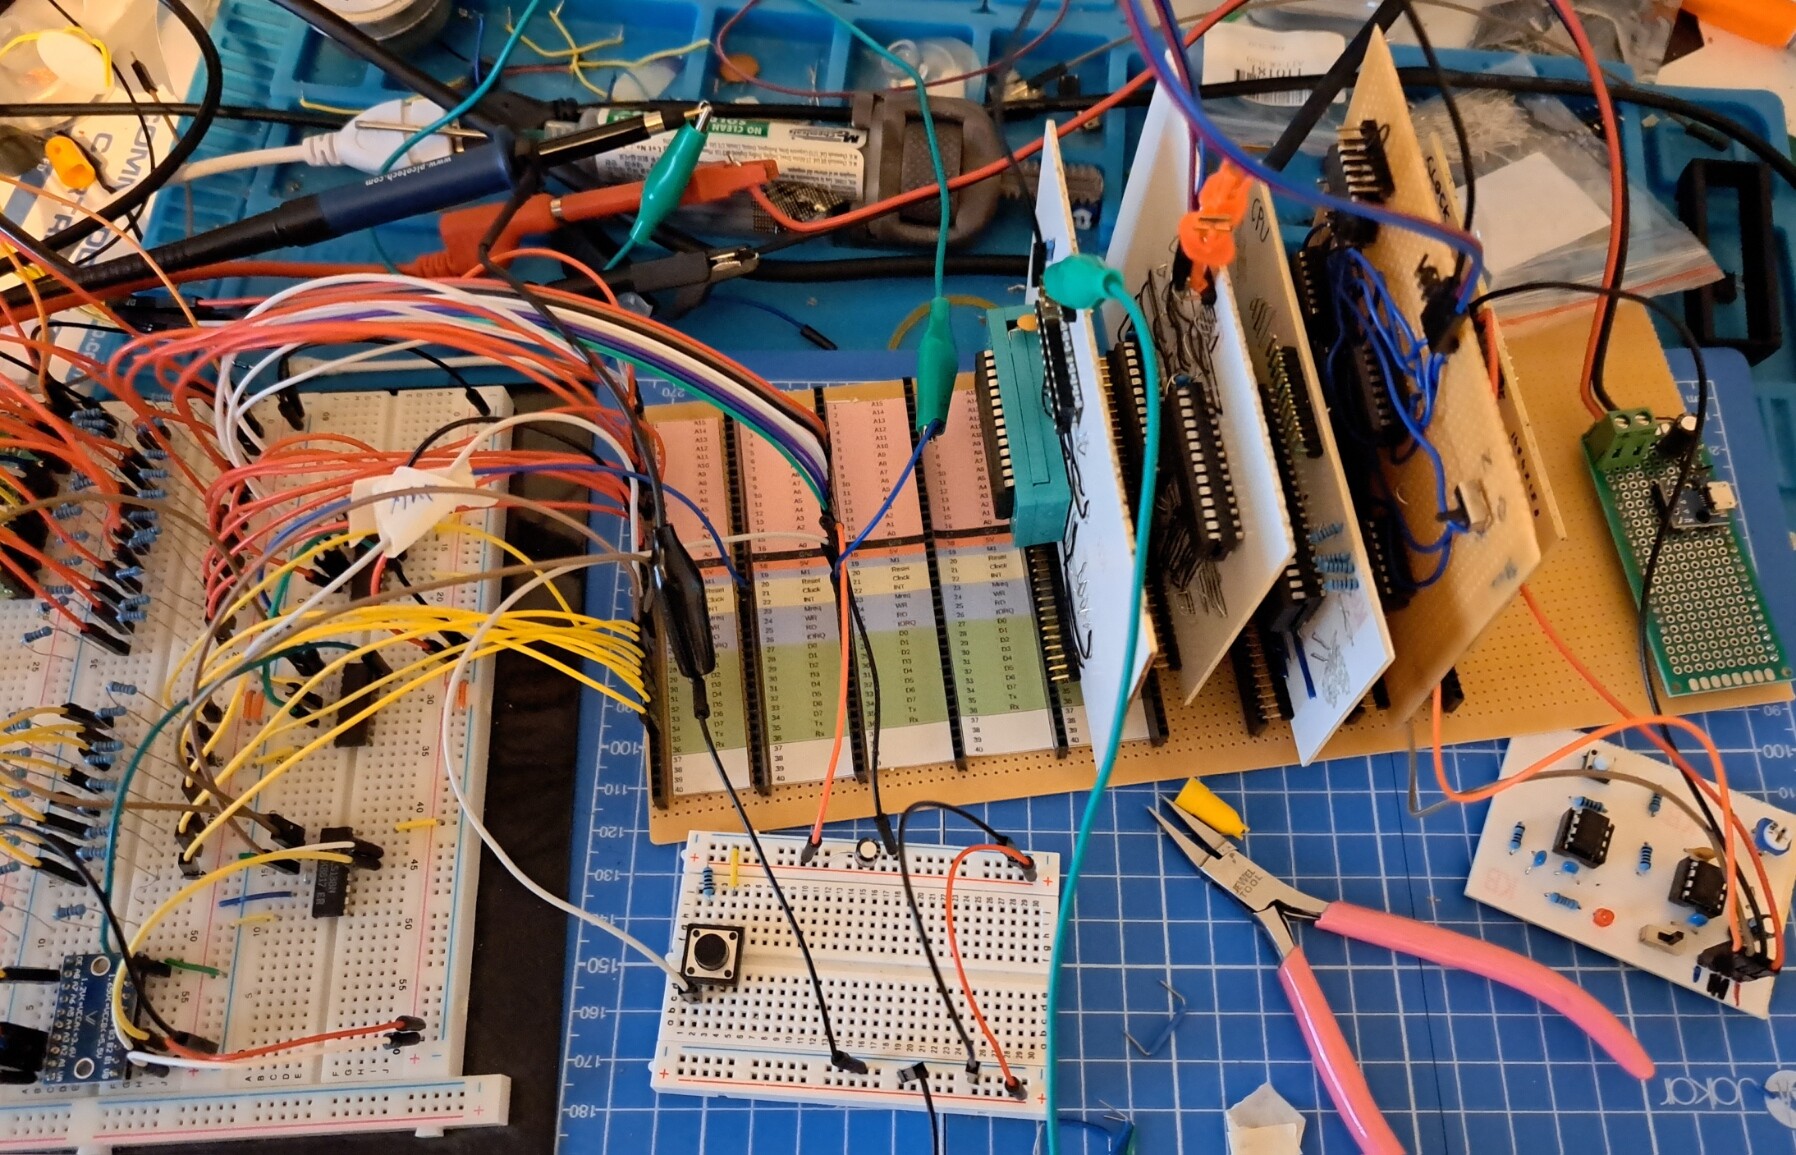
Here’s a picture of the mess that created that bootable machine. Isn’t she pretty?
Next steps
Next steps are to make sure my keyboard handling in the Pico VDU system can handle key modifiers (shift, capslock, control) and then I should be able to take ZYMON2 for a spin.